If you are using a PC, you can use Google Chrome to manage your online orders and automatically print them. It’s very easy to do this in two steps.
First, login to your Back Office.
Navigate to: General Settings -> General Settings
There, you need to select your location for changing this setting. After selecting the location, set Receipt Printing Options to Automatically and then click on Update button at bottom right.

Last step,
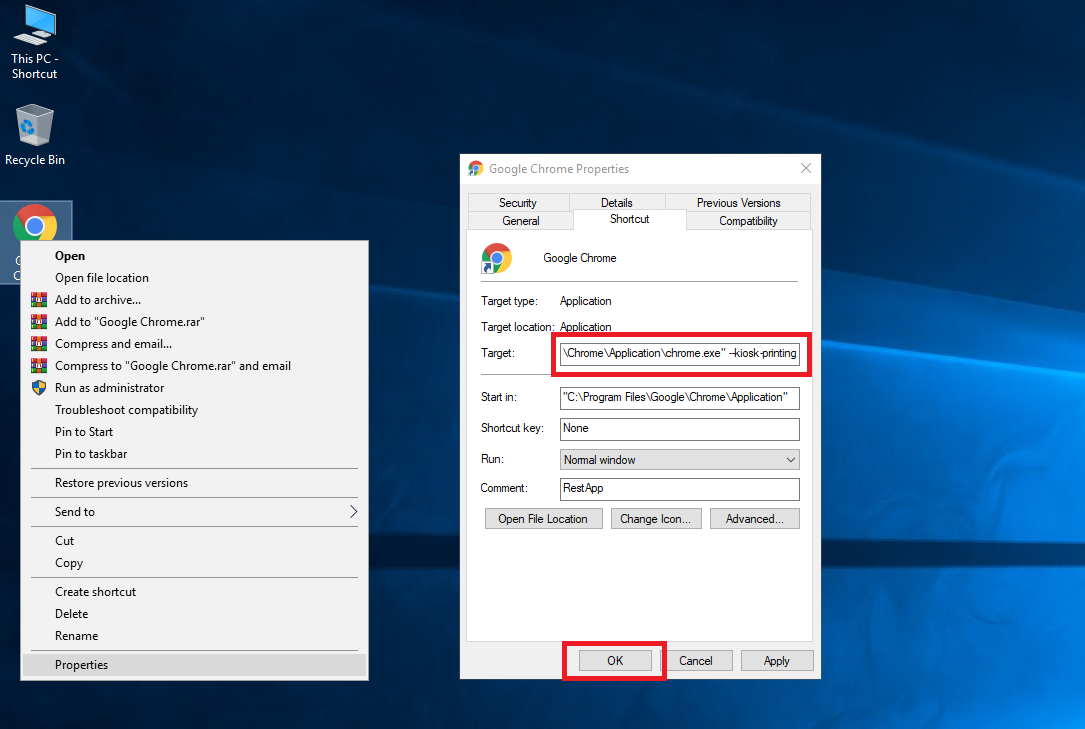
You need to add kiosk printing setting to your Chrome shortcut. For doing that, right click on Google Chrome shortcut on your Desktop, and click on Properties.
You will see an input named Target: as seen below. Just add the value below after ” symbol. Don’t forget to leave a space between ” and this value. It needs to me same with screenshow below.
Add this:
--kiosk-print
So, it will look like:
"C:\Program Files\Google\Chrome\Application\chrome.exe" --kiosk-printing
Now you need to close all your Google Chrome instances, and re-open Google Chrome with the shortcut that you changed.
That’s it, now you will have automatic printouts after approving orders or clicking on PRINT buttons.
Note: You need to set your receipt printer as default from your Windows Printers & Scanners dialog. You can refer to Microsoft.com getting support on how to do that:
https://support.microsoft.com/en-us/windows/how-to-set-a-default-printer-in-windows-10-e10cf8b8-e596-b102-bf84-c41022b5036f